- Free Shipping for orders over $249*
- +1 800-943-2341
- Aptika.ca
- Aptika.com
- Currency: CAD
- Français
My Account
How to use IDpack to display prices in retail or food store
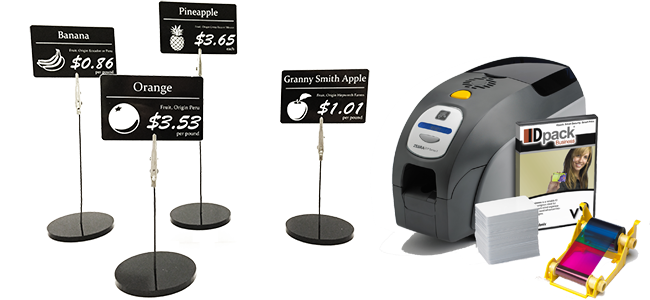
The first thing I usually explain to our customers is that plastic ID card printers are just like regular printers. Connected to a USB port, it will show up in "Devices and Printer" in Windows, the same way other printers do. You can print on it with Notepad, Photoshop, Word, etc. It is just a printer, only the format changes. Instead of printing on a Letter page, you print on a CR80 3.375″ x 2.125″ (85.6 mm x 54 mm) card.How can you use IDpack and a card printer to print great price tags for retail or food stores? Using CR80 (credit card format size) as your support, you can print anything on it. Most people use those cards for identification but it can be used for many different applications. In this business case, I'll show you how to use your printer to create price tags like this:
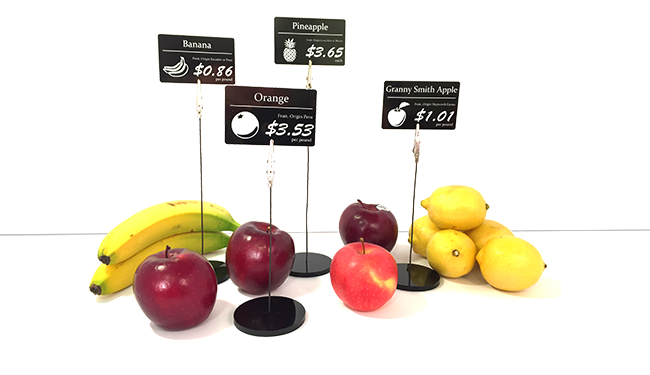
A price tag has to be cheap to make, and easy to read and understand. We need an icon, a title, a price, an origin, and maybe an allergy warning.
Let's start
The Hardware

To make them inexpensive, we recommend a single sided printer with black monochrome ribbon. A black monochrome ribbon is the most affordable ribbon available on the market, costing between $18-20 for 1,000 prints. That is 0.018¢ per card, very interesting! We also need plastic cards, Blank PVC Cards White – CR80 20 Mil – 500 pack is around $39.00, so 0.076¢ per card. The total is 0.094$ per price tag, not bad for a good-looking, professional price tag. Of course there is the cost of the printer and the software, but you can use the printer to print your employees' name tags, your business cards, loyalty cards, discount cards, etc... The printer can be used for many other applications inside your business, meaning it is not an expense but rather an investment. You can find a good Photo ID System starting at $2,000 that includes the printer, software, webcam, tripod, 500 cards and ribbons.
The Icons
We need to associate a "white picture" for each product to make them look good. It could be by category or department, as you wish. Many good collections of icons can be found online, but here is what we have been using for many years: IconExperience. IconExperience includes a search engine linked to a database of 1,500 icons. If none of them suits you, you can make them yourself in Photoshop or Paint! We recommend you use the 512x512 icon; at 300 DPI you can print a nice sharp image up to 1½” in size.
The Software
 IDpack 9 for Windows is the most comprehensive and flexible solution for ID cards on the market. IDpack supports ALL plastic ID cards like Zebra, Evolis, Fargo and Magicard.
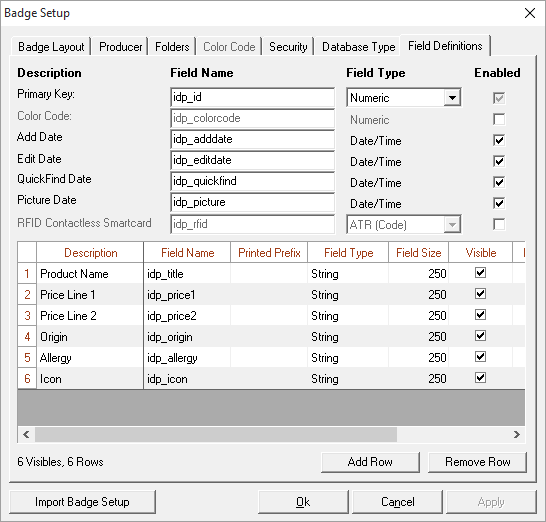
First you open IDpack Designer, create a new badge and set up some fields that are needed. In this example, I added Product Name, Price Line 1, Price Line 2, Origin, Allergy and Icon. I also unchecked Color Code, as we wont need it this time. Click OK.
Next, add a black square in the background, then add the different Dynamic Text (white color) over that. I also added a line to make the product name standout.
![]()
IDpack has a special feature called Dynamic Graphic Files. This feature looks into a folder for a filename with a chosen extension (in our case .PNG) and if it finds it, loads it and inserts it onto the design. So in the database, if you have a record with the work ORANGE in the field Icon, it will look in the folder for the file “C:\Price Tab\ORANGE.png” and insert it onto the design. It's very easy to load hundreds of products and match pictures automatically.
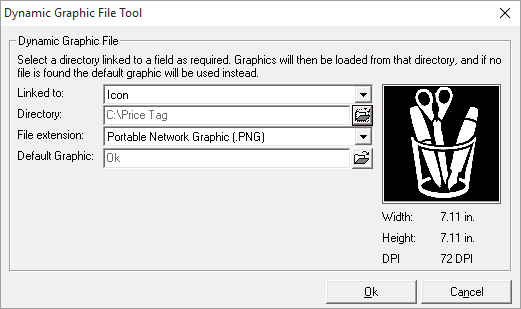
Click OK and you now have a Dynamic Graphic File object on your badge layout!
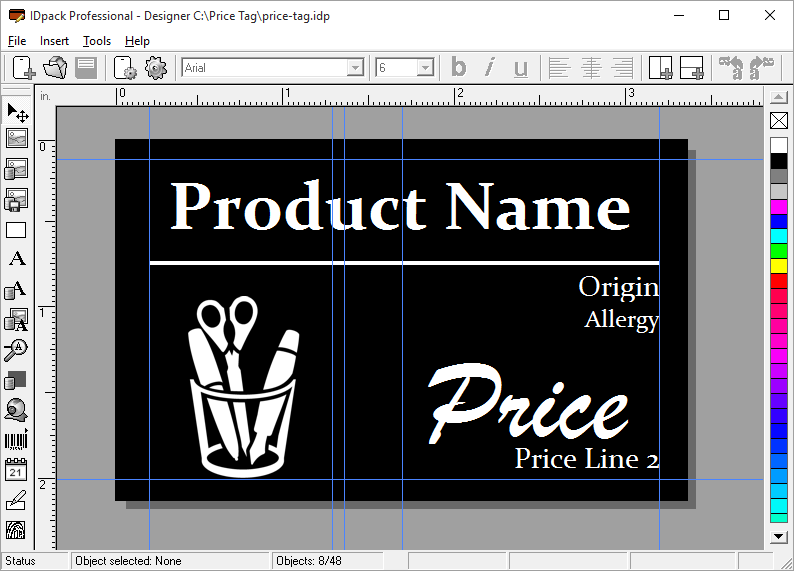
Now you just need to save the Badge Layout (IDP file) and open it in IDpack Producer to print your price tag. I added a few products in my database to show you what it looks like.
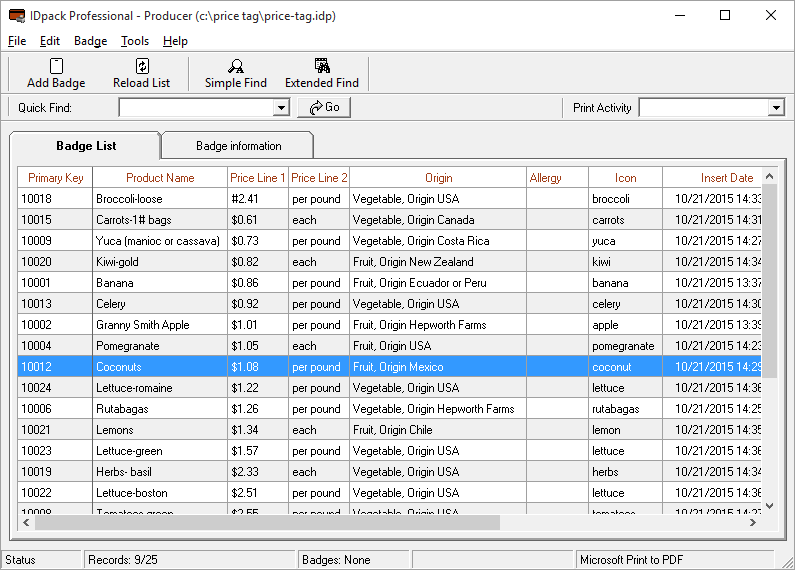
Right-click on a product and click Print Badge. A hint with IDpack, you can always press the F9 key on your keyboard and activate the Print Preview if you did not enable it by default.
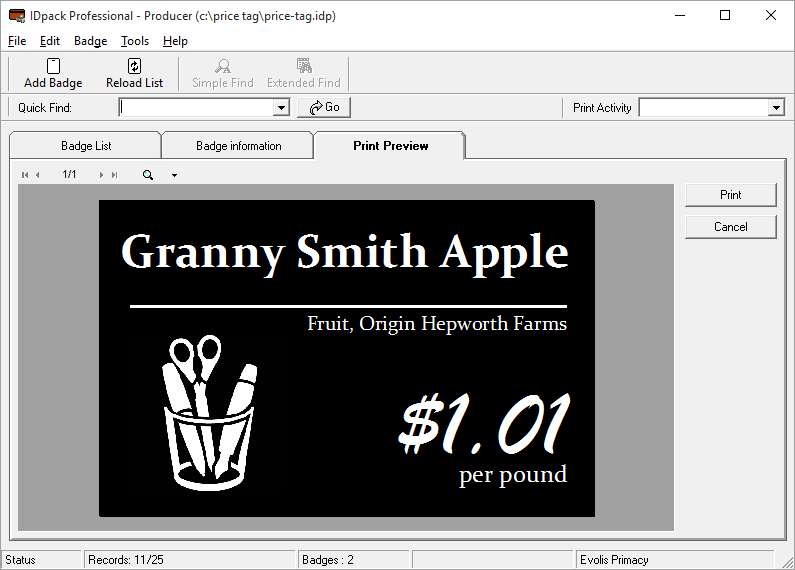
There you go. It's a nice-looking price tag. For a few cents more, you could also print price tags in full color. You just need to insert a color ribbon into the printer and create a design in IDpack Designer with color icons and background.
Please contact us if you need any help; we will be pleased to assist you.
Tagged on: idpack,price tag

